


Kameka's "My Magical World" Kite Box
Hello hello everyone! I am here to share with you my first project as a guest designer for The Fairytale Club by Andrea Bethke! For this project I made a kite box.
This kite box was an SVG file I cut with my Cricut. I then layered it with the "My Magical World" papers. I love how vibrant the papers are! Then I layered up a tag with a rosette and some of the die cuts. OMG these die-cuts guys! You really need to see them in person. I gave each element some dimension with foam tape. Also, when you open the box, you will find it filled with some cute rolled roses!
I haven't made rolled roses in a while. It was so fun, and I really like how everything turned out. So go grab your "My Magical World" collection now! Also check out my video for a closer look:
Water Color and Peonies with Aimee
It’s Aimee again! Today I got messy with the “Beautiful Dreamer” Kit and just had to share with you!

I went way out of my comfort zone with this one! I mixed water colors with a fancy cut paper and machine stitching.

I started this layout off by using a cut file from Kim Watson, you can find the file here. I scaled down the file and cut it using the “Her Name is Aurora” 12x12 paper. You guys, this paper is so beautiful and the decision to cut it was so hard to make!
I printed my photo to look like a polaroid picture.
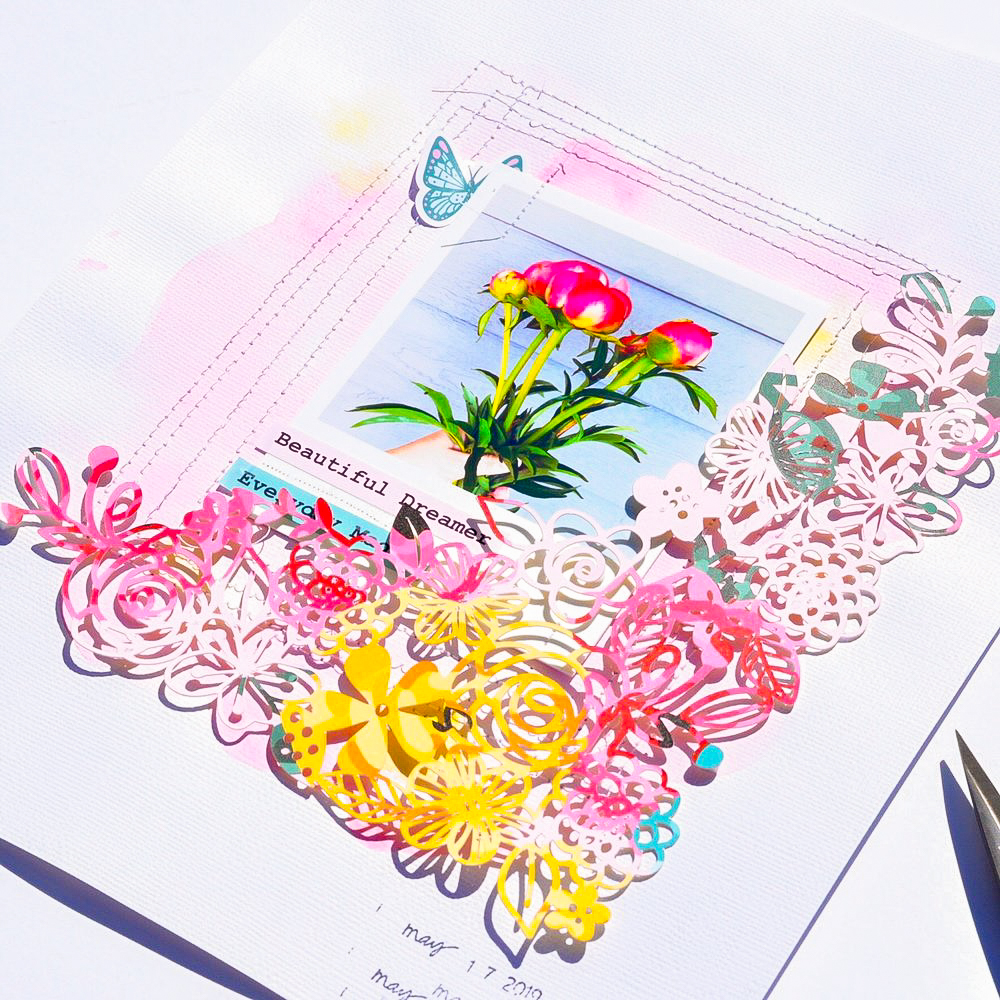
I marked where I was going to adhere my photo and I water colored around the outside of those marks.
Now, I really don’t know how to water color. I just moved some color and water on the paper and this is the final look! This is WAY out of my comfort zone.

After it dried, I placed a heavy book on my paper and let it dry overnight {I don’t care for how the paper gets wavy after you have put paint/water on it - another reason why this is out of my comfort zone}

I adhered my photo to my paper and then stitched around the photo several times.
I used some stickers from the sticker sheet to complement the photo, and then I placed my cut file over my photo, adhering it with 3-d foam adhesive.
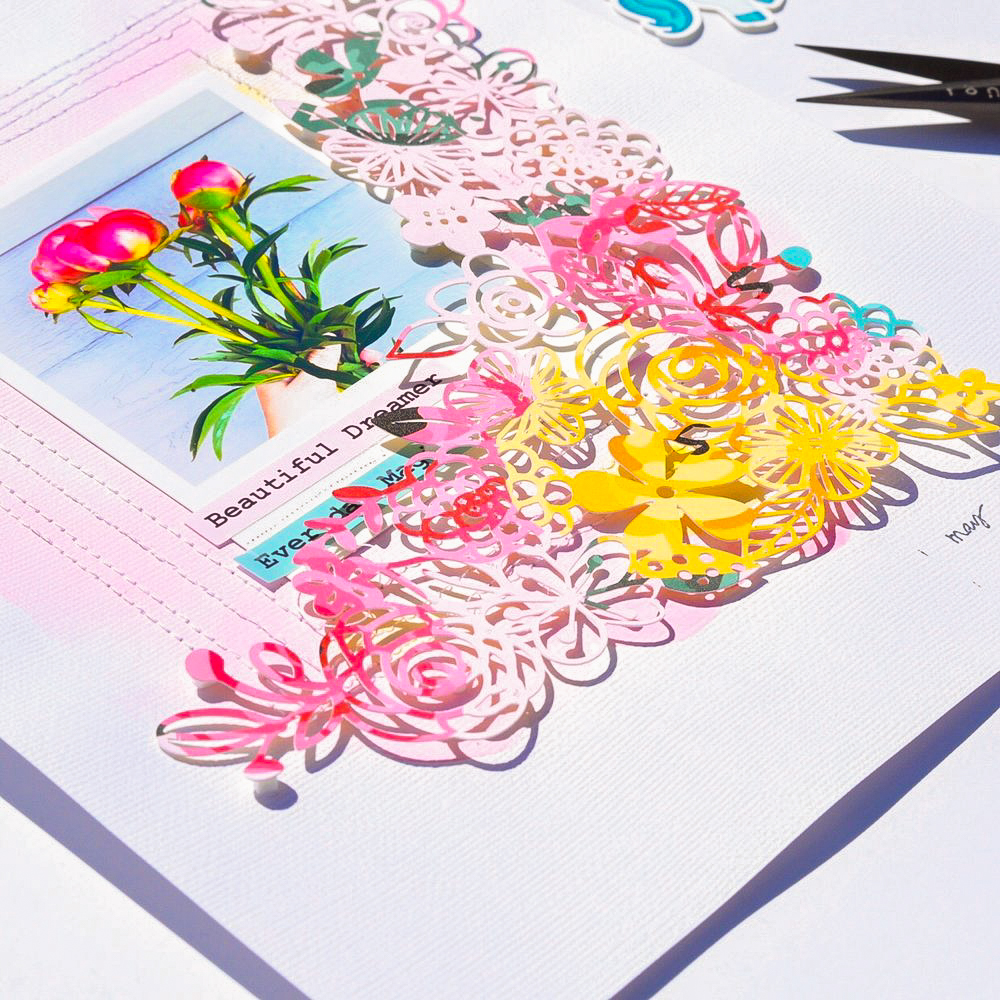
I also dated the layout with my date roller stamp!

How often do you leave your comfort zone when scrapping???
XOXO Aimee
Aimee's "Eat Sleep Scrap Repeat" Layout
Hi everyone, it’s Aimee! It’s been awhile since I’ve posted. But I am so excited to be back and sharing this layout with you, using the brand new kit Beautiful Dreamer!
So basically just scrap lifted this page from Paige Evans! I knew this cut file would look so awesome with the Beautiful Dreamer Kit!
To create this page, I started off using a cut file from Paige Evans. You can find the EAT SLEEP SCARP REPEAT cut file here.
I cut the it using plain white cardstock, I then used 7 different papers from the BD kit. Actually, I just used 4 different sheets that are double sided!
I separated the cut file and cut EER + LAT from “Spring Dream”, APE + SRA from “Her name is Aurora” TSP from” Beautiful Dreamer” and heart CE + EP from “Believe”.
I backed the cut file and then placed all the letters inside the cut file. I then ran the whole cut file threw my sewing machine for a bit more dimension.
I used “Flora Fauna, and Merryweather” 12x12 as my base. I used 3-d foam adhesive to “POP” the cut file off the page. I used a border punch to punch the bottom of “Make it Pink, Make it Blue”.
I used a square instax photo for my layout. I layered it with a pink frame from the Variety pack, and used mini staples to secure it in place. I also layered the castle die-cut and a vellum butterfly die cut from the Variety pack over my photo.
To finish off the layout I layered the blue bird and yellow butterfly from the Floral Emphemera kit under the cut file for dimension.
I love how the 12x12 “Flora Fauna, and Merryweather” paper helps give the layout depth and dimension with the faux paint and handwriting. It makes all the layers POP!
Do you ever take advantage of the base papers design and incorporate it into your design?
Thanks for stopping by,
XOXO Aimee
Summer Printable
Hello everyone! Today I just wanted to give you all a free, cute, summer printable to play with! So here it is in a couple different color schemes in a couple different sizes. There's also a black-letter version to use as a cut file. To download these, left-click on the thumbnail, then right-click on the image that loads and select "Save Image As..."
6x8

Cut File

4x6

Free, downloadable cut files!!!
Hello everybody, it's Andrea here, and today I wanted to give you all some frame cut files from the "Hello Beautiful!" collection. Actually, three of them are used in the collection, and the last one was designed for it but wasn't used in the end. To download the files, left-click on the images below, then right-click and select "Save Image As...", and then choose a location on your computer. Enjoy!


